Intermountain F units, as delivered.
 Intermountain F-7, renumbered, detailed, and weathered
My First Impressions
Okay, we've beaten Intermountain about half to death, but as I have finally received my decoders today, I can provide a glimpse into the performance of these new locomotives, warts and all.
First the warts:
I had to perform the outrageous task of painting the nose grabs black, as this was the WM practice, not the yellow provided by IMRC. Soon I'll be switching the stock horns from 5-chime clusters, and I'll also add some cooling tubing and spark arresters to the roof.
Operationally, the only thing that bothers me is the position of the headlight LED, which sits low to allow for the cab interior. It nests in a plastic ring that is part of the split frame washer/coupler mount casting, placing it below the headlight lense itself. The LED is plenty bright, but the angle causes the wash of the light to go up in the air at about 30 degrees, projecting almost no light on the track directly in front of the engine. I didn't notice this until it was lights out time for Andy, and we were watching the train run for awhile in "Night Vision". The F7 headlight shot a pool of light up on the ceiling. It was pretty cool to watch the shadows it projected when traversing the thru truss bridge, but compared to my Atlas GP-30, which shoots a beam forward and slightly down, it was disappointing.
For those of you taking notes, the F7 light was bright enough for Andy to make a shadow puppet of our dog Marty on the ceiling. I'm not sure how that relates to the tractive effort or the mass of the alloy, but it was impressive nonetheless...
Finally, the coupling distance has to go. I can't go the route of a drawbar, prototype practice on the WM dictates that F's get mixed and matched with a variety of power. Frequently a single F would be tasked with running a bunch of empty hoppers upriver to Knobmount, so this is a possibility. but to get a proper A-B-A, I'm had to come up with something. I experimented with mounting an MT 1015 to the truck frame, which was labor intensive, but seems to work. However, on the remaining units, I've simply installed a Unimate dummy coupler, using the version with the screw mount, and putting it right into the pad that held the stock coupler. I typically assign these in A-B sets, so on the new B units, I leave the factory coupler on the aft end, and use the Unimate to couple to the engine. So far this seems adequate.
Now the goodies...
Appearance... The numbering issue notwithstanding, these are beauties. The paint and lettering is crisp, the application of the details is precise (although one has a barely perceptible bow in the stainless grille) and the proportions are right on to my eye. Mr. Wallet better watch out when the corrected B units get here.
Performance... Now, bear in mind that these are brand new out of the box, so they will have to prove themselves over the long run, but these are by far the most superior running locomotives I have ever run. They are nearly silent, the glide across the rails, have zero issues with dead frogs, they can crawl at speed step 1 (out of 128). They are quieter than my Kato SD-40's, pull more than my Atlas SD-35's, and achieve scale speed at least as well as my late model Life Likes and Atlas motors.
DCC Install... The easiest one ever. I had to slip a wee bit of insulating tape over the brush contacts, but other than that, two screws out, swap the board, two screws back in and you're almost done. You don't have to disassemble the drive to do the basic job. You do have to solder the headlight wires to the new board, but this isn't a big deal if
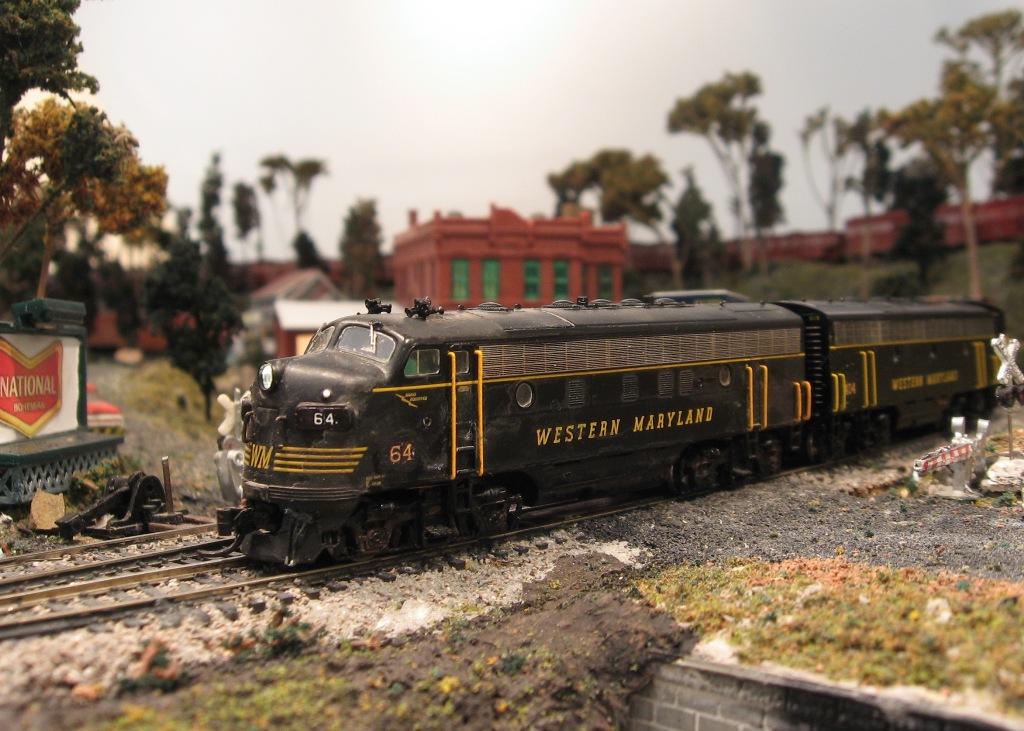
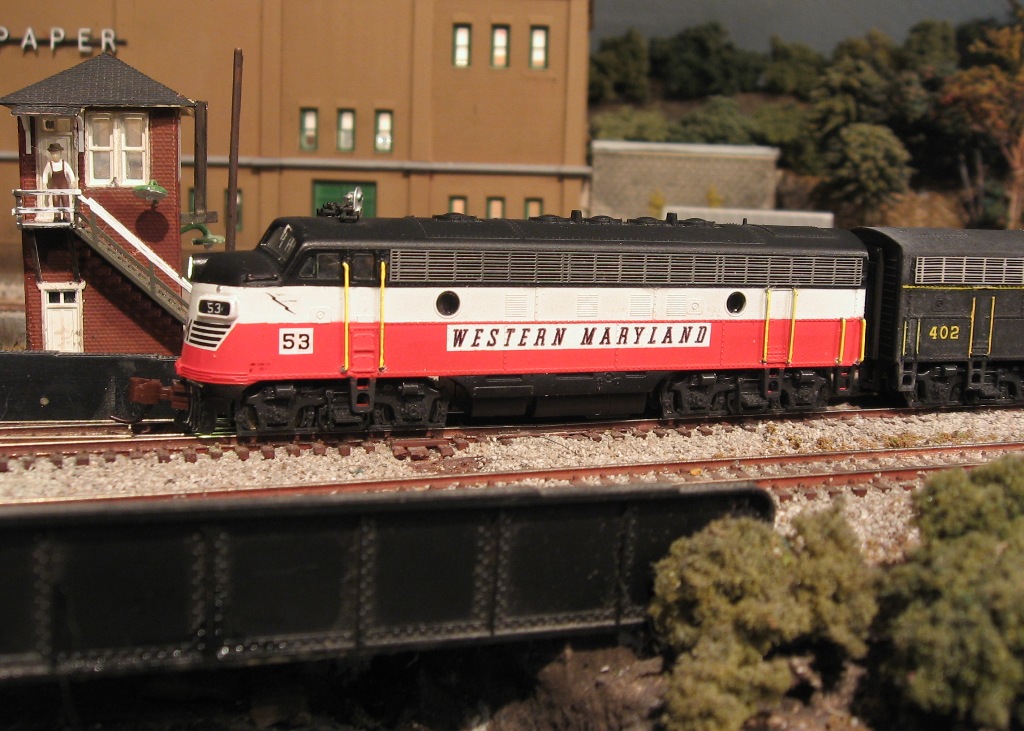
After years of anticipation, I finally got my hands on an A-B set of Kato F units in the spring of 2009. They came in a swap for a surplus GP-35 I had laying around. Actually, what I got was two A units, one with a single headlight, and the other with the dual headlights. Ironically, neither shell made it to the fleet. I picked up the B unit shell in another swap, and I botched the paint job on the single headlight A, Tim Adler (Sizemore on the Railwire) came to the rescue with the shell you see here.
Tim painted the A unit in the glorious Red White and Black "circus" paint scheme, and added the nose herald and the road number. I custom made the side lettering, since Micro Scale doesn't make the correct lettering for Western Maryland F-units. Tim also added the brass 5-chime horns, windshield wipers and maintenance grabs, while I added the stainless grill overlays, grab irons on the sides and finished the detail painting.
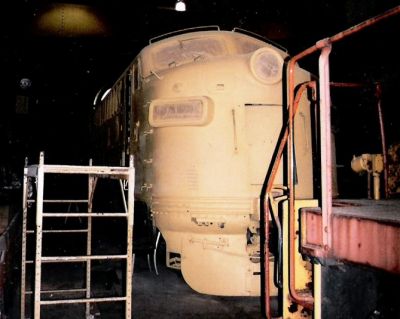
Kato F-7 A in the Paint Shop... Modeled loosely after this scene recorded at the B&O Museum in Baltimore during the restoration of WM 236.
Appearance - Out of the box, the Kato F Unit is pretty austere compared to the newer releases from Intermountain. There are no separately applied details, and what details there are are cast into the shell. I believe this is still the case even on newer Kato releases. I believe that newer models have lighted number boards, though. But the proportions of the model are good, and some modelers say that Kato has a more prototypical ride height than Intermountain, but that doesn't bother me... yet...


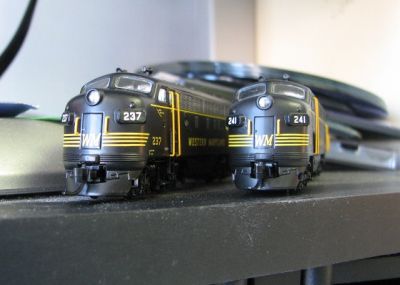
When I took delivery of my first two F-7 A's in N Scale from Intermountain, I was generally very pleased with the model's appearance.
As we know, the first run of this locomotive was the victim of shoddy research, and questionable quality control, but Intermountain has since corrected the main problem, which was a reversal of the B-unit roof details.
Also, the Western Maryland version of this model in the first run was presented with inaccurate road numbers for the version of engine offered. (The IMRC model is a phase I F-7, with 36" cooling fans and horizontal grilles on the radiators, which were numbered from 53-66 on the WM, these came numbered as 237 and 241, which were phase 2, with 48" fans on the dynamic brakes, and vertical grilles) This is a less egregious error than the shell problem, but given the volume of information available on the internet, and the speed with which it can be obtained, cross-referenced and confirmed, there's no excuse to miss a significant road-specific detail like this. The good news is that in the 2008 run of WM, the road number issue has been corrected, and the B-units are very nicely done. I have since ordered a third A and 2 B units.
The numbering on the B's in this second run follows WM practice from the mid 1950's, using a -B designation with the same number as the A. Since my layout represents the railroad in the late 1960's, I renumbered the B-units into the 400 series. I've also renumbered the two earlier A units to reflect the phase 1 model.
Overall, though, the IMRR F-7 is very nicely detailed, with factory applied grab irons, knuckle couplers, and a smooth running mechanism. The quality of the paint and lettering is excellent, and conversion to DCC is very easily accomplished. I will be making some minor modifications to mine, including painting the nose grab irons black, adding 5-chime horns per WM practice, and modifying the skirting around the fuel tanks. Other details will also be added.
Now that the B-unit shell issue is resolved, I anticipate adding quite a few more of these excellent models to round out my fleet. I anticipate picking up a set in the circus scheme when they come out, and maybe a couple of more black ones. I'm hoping that they're planning a release of the Phase 2 carbody, which would be great.
 Intermountain F-7, second release (2008)
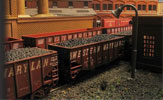
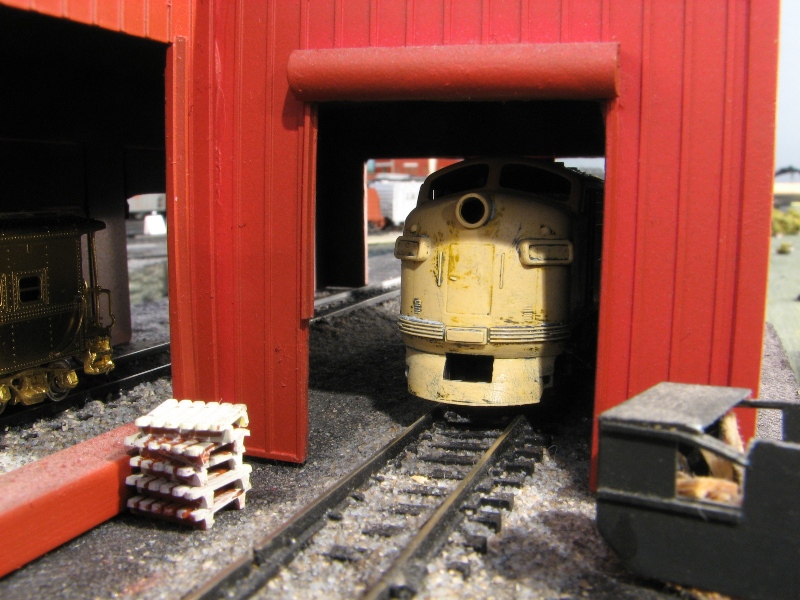
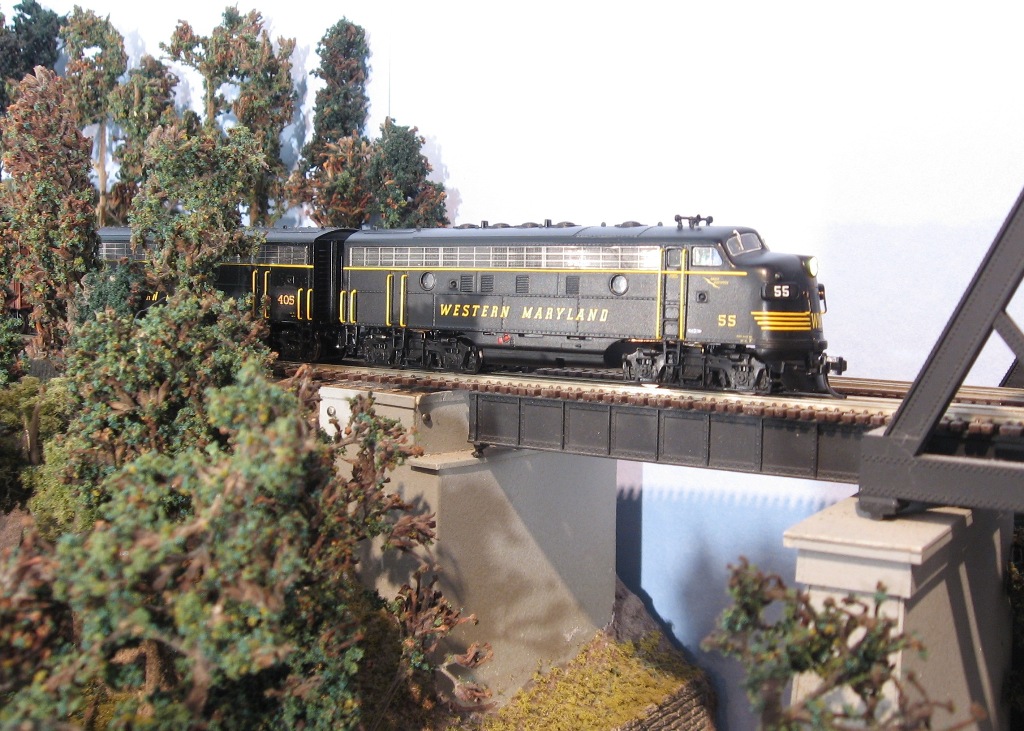
F-7 55 crosses the Potomac on its way into Ridgely.
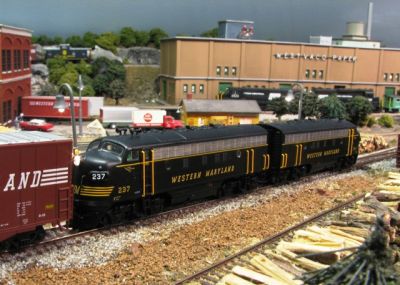
The East Local speeds through the pulpwood yard at Luke. The engines from Intermountain run great and look good individually. The coupling distance between the units could be improved, though.
you are a semi experienced soldering pencil user. You do need to make sure you insulate the frame right near the headlight contacts though, or you'll cause enough of a short to blow the LED. Don't ask me how I know this...
With the release of the second run of WM F-7's, I picked up a couple of B units. I found that it was a lot more economical to install a hardwired Digitrax DZ-125 to the factory PC board than to buy the DN163IA. I simply had to cut a couple of the contact strips to isolate the motor from the frame, then tuck the decoder into the space where the cab would be on an A unit. This saved about $30 between the two B's I got. There's no discernable difference in performance between the two chips.
To close up the coupler distance, I've found that the best option is to use the rigid Unimates with the screw pad. I cut off the shank and use the shorter of the two mounting positions, and this works quite well.
So there's my first impressions. I stand by my prediction that Kato is doomed to second place in the F-unit wars.
![]()
Here's an easy way to Tune up Your old Kato F units to prevent stalling
 Kato F-7, Early Release (mid 1980�s)
I did the B unit myself, painting it in the basic black speedlettering scheme, again using decals I made myself to get the proper lettering size. I added stainless grills, and modified the skirting around the fuel tank. I only painted the factory cast on grabs on this one. So far I haven't heard from the State Police about this being a violation, so they'll stay that way until I get around to shaving them off and adding wire grabs.
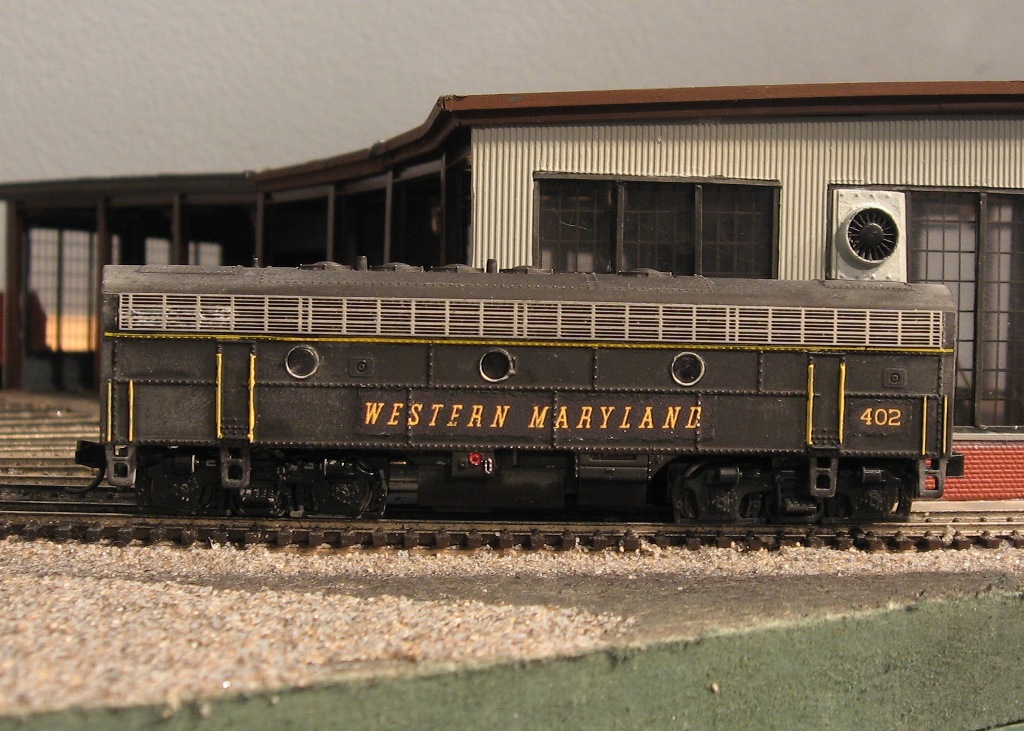 Kato F-7B, Early Release (mid 1980�s)
As with the Intermountain engines, I mounted a Unimate dummy coupler on the forward end of the B unit, and installed a working Micro Trains coupler at the rear. There is no problem with coupling distance on these, as Kato utilizes truck mounts for the couplers, other than the front pilot of the A.
Performance - This was one of the premium mechanisms of its day, and it's still very good. The main problem to overcome is a very fast gearing, which I did by stepping down the speed with DCC. The only other issue is the problem that besets all Kato mechanisms of this vintage, and that's occasional spotty pick up. There are no bronze strips, only the weight of the cast alloy frame resting on the cast alloy trucks. This causes intermittent contact if your track's a little rough. Other than those two items, the engines run very smoothly, and very quietly.
DCC Installation- I used DZ-125 decoders, which I hardwired to the motor. I used the factory light board to make contact with the frame for track pick up, as there's really no other practical way to attach wires for that purpose. In the B unit, I used the open area under the front to stowe the decoder, on the A, I had to mill out the back of the frame at the top to make room. Both installations were relatively easy.
I added a warm white LED to improve the appearance of the headlight, and wired it to function directionally. All in all, these are solid locomotives, and they'll pull a long train all day. The renovation was well worth the effort.
With the advent of Intermountain's F-7 model in 2006, I promptly retired all of my Bachmann Plus and Spectrum models and sold them off. Some were custom painted and detailed, some were the factory Circus scheme with details added or numbers changed, but I had trouble converting them to DCC, so out the door they went.
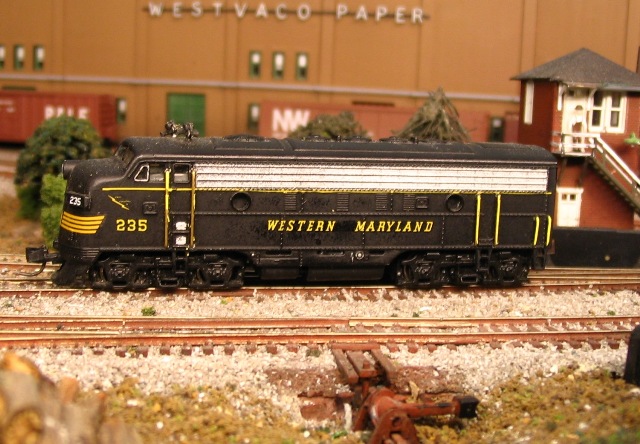
Paint and Detailing
This view of WM 235 is pretty typical of the modifications I made to my Bachmann F units. I added brass wire grab irons at the side ladders, put 5-chime horns on top of the cab, and added paint and lettering.
The base coat on all my WM black diesels is a simple gloss black spray paint (yes, from a can... I hate cleaning airbrushes!) This goes over a primer to assure good coverage. Once that sets, I applied decals.
Unfortunately, the correct markings for a WM speedlettered F have never been available. I used the winged nose herald from an ancient set of Northeast Decals, which is a little too "plump" and a little too orange for my tastes.
The side lettering is the 12" herald from the MicroScale set, which is appropriate for RS-3's and switchers, but too small to represent the 14" lettering used on the F's. I made the compromise of just using the wrong size lettering on all of the engines, so at least they matched.
Purists will forgive me that #57 is modeled as a Phase II F-7, not the Phase I which was the prototype. The lashup looked pretty good together, and once they ran in for awhile, they were relatively smooth runners. The Bachmann drive tends to draw a lot of juice, which caused several decoders to fail, leading to their retirement from the layout.
#234 is in the Bachmann Plus factory painted "Circus" scheme, although I touched up the nose to correct some problems. The numberboards were painted white, and the red band below the WM herald was widened. Grabs and horns were also applied as per the other Bachmann engines.
All of the Bachmann engines have been retired and sold.