The key to having a good time running trains on your layout is to make sure that your design allows for certain basics. I think most would agree that you should have adequate staging, at least one yard, a passing siding or a couple of crossovers to allow for multiple train operation, and a switching area or two. With these elements in place, even the smallest layouts can keep you challenged for an hour or so.
In a larger space, you can be easily fooled into thinking that a big layout is primed for operations just because you have more elbow room. I can tell you from experience that there is no such guarantee. I've worked with layouts that were very large, with beautiful scenery, but due the track plan, damn near impossible to run a local. It lacked crossovers on the main to allow access to various industrial sidings, and the yard was small and only allowed access from one direction unless you tried out risky backing maneuvers through a long tunnel or down a steep hill.
With those things in mind, I set about to design my N Scale Western Maryland Railway to be operations-friendly. To do this, I did some research on how the real WM worked. I looked at old system maps, and read numerous resources on the subject. The best source I’ve found is the book “Fireballs and Black Diamonds” by Roger Cook and Karl Zimmerman. This great book dedicates whole chapters to the great rivers of coal that were shipped out of West Virginia and western Pennsylvania, and to the time-sensitive “Fast Freights” that used the WM as a bridge from the manufacturing centers of the Midwest and the markets of the east.
Most of the information I studied was based on the WM’s operations in the middle to late 1960’s, up until the 1973 inclusion in the Chessie System. The railroad was still operating all of its primary arteries, and newer second generation diesels were making their way onto the property. This pre-Chessie era is what interested me the most, so I decided to set my layout in expanded time frame of 1968 – 72. This map shows the basic configuration of the WM in that time period.
SYSTEM MAP

Primarily, fast freight bridge traffic flowed between the N&W connection at Connellsville, Pennsylvania and the Reading junction at Lurgan, Pennsylvania near Shippensburg. The other major flow was coal from the branches radiating from Elkins, West Virginia being moved east to the Port of Baltimore, or via Lurgan to the steel mills of eastern Pennsylvania. There was a variety of other traffic that moved across the WM, but I wanted to make sure that my layout would provide adequate runs to represent these two key elements.
The Fast Freight element is being modeled using a more or less continuous loop that runs between two hidden staging yards by way of the yard at Ridgeley. While the actual Ridgeley Yard near Cumberland was a relatively minor yard on the WM, I'm using the name for a yard that is really a composite of Ridgeley and Knobmount at the west end of the Cumberland Extension, and Hagerstown, the real nerve center of the railroad.
Alpha Jets will be able to enter from the east end staging, representing the Reading connection at Lurgan and enter Ridgeley to change locomotives, switch out cuts of cars, then carry on westbound to Cumberland, past MY Tower, and on to the west end staging yard that is located on the lower deck under Ridgeley. The west end represents Connellsville and the connections with the Pittsburgh and Lake Erie, and the N&W.
The Thomas Sub is being modeled as a point to point branch line, starting at MY and twisting along to Elkins, where a smaller yard is situated. Active mines will be located along the way to provide a steady flow of oxide red hoppers full of black diamonds. Areas to be represented along this line include Luke, Shaw, and Thomas. The towns will all be significantly compressed, but I hope to include the stations at Thomas and Elkins as closely to the prototype as I can.
LAYOUT SCHEMATIC

The modeled portion of the railroad begins in the East Staging Yard below Luke and Maryland Junction. This yard represents destinations to the east, including Baltimore, via the East Sub, York via the Hanover Sub, and the Reading connection at Lurgan via the Lurgan Sub. The West End of the yard is located on the lower level under Ridgeley, and represents Connellsville, including Rockwood Jct., where Laurel Valley trains originate.. Operationally at least, the Thomas Sub is modeled in its entirety from Elkins to Maryland Jct. Space limitations forced me to leave out the yards at Knobmount and Ridgely. Maybe next time!
Other elements that I am trying to capture include coal movements from Somerset, Pennsylvania, local switching and coal mine runs along the Thomas Sub between Cumberland and Elkins, and the classification yard and engine terminal at Hagerstown. Needless to say, to do all this in N scale in a roughly 16’ x 16’ space requires some acrobatics as well as imagination. To make the design work, though, all I had to do was keep in mind the basic operating schematic of the WM. Despite a few components that had to be compressed out, relocated slightly, or otherwise deviated from the prototype, I think it is coming together nicely.
ARTISTIC LICENSE
As with any model railroad, I had to modify some things to get all of my operating and scenic goals to fit in the room. The single most obvious is the consolidation of the yards at Knobmount and Hagerstown to create one functional yard that I'm calling Ridgeley. Hagerstown, with it's two large class yards and full blown engine terminal and shops was just too big to do it justice, and Knobmount's vast yard just couldn't be worked in. So I've developed a functional model railroad yard that suits the operations I've concocted, and included a big enough engine terminal to reflect the yard's importance. Operationally, the yard handles all east and west bound through freights, and serves as a division point in terms of run through locomotives from the connecting lines.
While Knobmount was critical to the marshalling of coal, I knew I didn’t have room for two big yards. So all switching of from the Thomas Sub will be done at Elkins. At Ridgely, it is combined with coal from Rockwood and Bowest (both in staging) for the trip east to Baltimore. I did retain Maryland Junction, where the Thomas sub splits off to the southwest and the Connellsville sub goes north. Since I was including this split in my track plan, I figured I could at the very least include a model of the tower there. Instead of guarding the entrance to the Knobmount Yard, MY Tower on my layout stands in the midst of the busy paper mill at Luke, Maryland.
Another element I would like to have included but couldn’t is the Black Fork Grade between Elkins and Thomas. Since I’ve adopted DCC to operate the trains, I really get a kick out of “live” helper service, and incorporating this challenging piece of railroad would have been a blast. But alas, the plan ended up with less than 6’ of running between the two towns, barely one train length, and there was no need for such a stiff grade here. I plan to include some rugged scenery to provide a visual divider for the operators, but that’s about it.
Operationally, I couldn’t work in any significant interchanges with the B&O. This was disappointing, since that’s one of the elements I really hoped to capture, particularly at Cumberland and Luke, as well as at Cherry Run. But again, the civil engineers won out over the prototype, and space just wouldn’t allow it.
I did, however, find a way to sneak in a bit of free lanced interchange service. Years ago I had a free lance layout I called the Laurel Valley Railway. The basic premise was that this was a former Penn Central branch originating at Latrobe, PA and reaching Somerset via the abandoned turnpike tunnel. There it connected with the Western Maryland via Rockwood, along the same route as the Gray Trains. Since all of this was in staging anyway, I decided that the Gray Train would provide Laurel Valley interchange traffic, as well as coal from the mines served by the WM.
Main Level
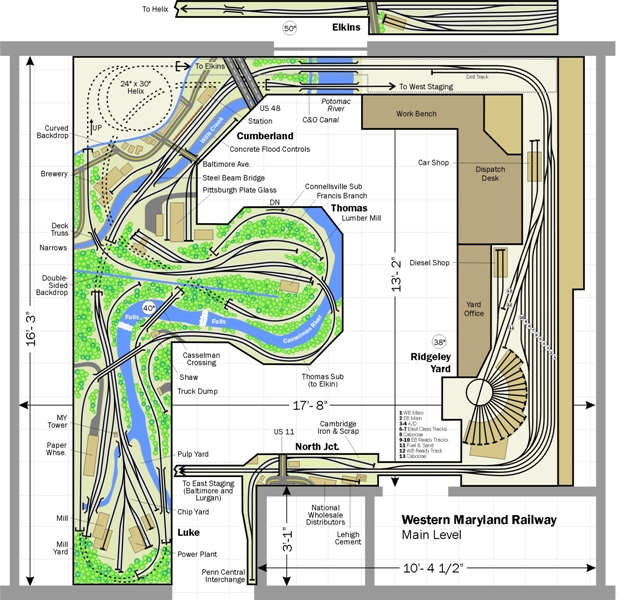
Click the link below to see the staging levels. Click your browser's "Back" button to return to this page.
The track plan has evolved several times, but the diagrams posted here are pretty close to achieving all of the operational goals. The logical place to begin a tour of the railroad would be at Ridgeley Yard. First we’ll check in at the yard office, then climb aboard our train. We’ll be heading west today into the Potomac River valley on the way to Cumberland, then on to Elkins via the Thomas Sub.
Our engines are on the ready track, just east of the 20-stall roundhouse. They’ll take the inside main around behind the roundhouse and run along side our train, the West Local, which runs from Ridgeley to Elkins. This was one of two scheduled trains on the prototype Thomas Sub, the other being the East Local that originated at Elkins. We’ve got 20 empty hoppers, 4 empty boxcars, two chemical tanks and three bulkhead flats loaded with pulpwood, and two flats of machinery headed to the Sawmill in Thomas.
Back in caboose 1841, The conductor checks his paperwork, radios ahead that he’s ready to go whenever the trainmaster releases us, then climbs up into the cupola to observe the train as it gets ready to leave the yard.
LAYOUT TOUR
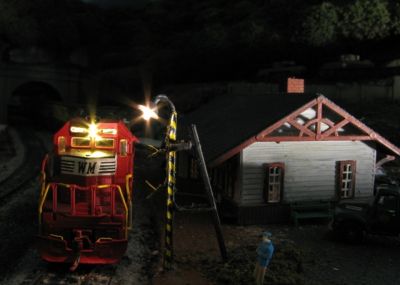
There’s a broad turn to the left as the train leaves the departure track, so he has a good view. We head to the valley of the Potomac. On the prototype, the WM crosses the river 9 times before it reaches Cumberland, and traverses 5 tunnels. On our model journey, we’ll cross just once, but there’s a lot more bridges ahead of us. We approach the Cumberland Station, constructed around the turn of the last century when the WM provided through passenger service to Chicago, competing with her cross town rival the B&O. By 1970 the grand old building is a little threadbare, but it still buzzes with railroad activity, housing a freight agent’s office, maintenance of way officers and the dispatcher in charge of the CTC line all the way to Connellsville. Again, we wouldn’t be passing the station on the prototype, but it was a landmark I didn’t want to miss on my layout.
We’ll pass the Queen City Brewery, and enter a short tunnel at the west end of town as we head out through the famous Cumberland Narrows. There's a short tunnel, then we appear on the other side of the mountain, approaching the train order office at Maryland Junction. MY Tower has stood sentinel for decades at this busy location, its crew directing traffic from Hagerstown and east to either the Connellsville line and the Midwest, or the Thomas Sub and the coal fields of West Virginia. Other than Hagerstown, it is the most important junction on the railroad.
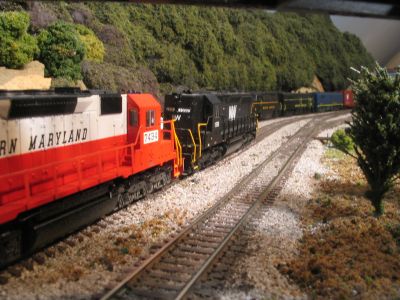
The order board advises us to wait on the westbound main, as AJ-2, one of the high priority Alpha Jets, is on its’ way down from Deal, the summit of the New Line to Connellsville. Our train is headed up the Thomas Sub to Elkins, so we'll hold until the high priority manifest rolls through. After several minutes pass, the headlight of AJ-2 comes into view. On the point is a pair of WM SD35's, resplendent in its fresh looking red white and black paint. Trailing it is a pair of older SD-35’s marked for the WM’s Alphabet Route partner, the Norfolk and Western.
The Alpha Jet speeds past the tower, having been granted a clear signal to proceed to Hagerstown, where it will exchange cars and motive power then barrel through to make the Reading Company connection at Lurgan before midnight.
The tower operator gives us the go ahead, and we roll slowly past the tower. We have to make our first stop of the day at the sidings serving the huge Westvaco Paper mill complex at Luke. We need to leave behind our pulpwood loads, chemical cars and two of our empty boxes on the siding, and pick up a few more empty coal hoppers, and four empty wood chip cars. We have to work fast, because the tail end of our train is still out on the main, and AJ-2 has a second section that just cleared the signal at Deal.
It doesn’t take long to take care of business, and we are again underway. There’s a long steady climb up from Luke to the summit, where we will again cross the Potomac, this time over a through truss steel bridge. Just beyond the bridge, we have to make another stop, calling on the truck dump at Shaw. This small facility produces three cars of bituminous every two days. The conductor checks his paper work, and tells the brakeman which cars will be set off. We’ll also be picking up the cars filled with the last two day’s work while we’re here. The next stop will be Thomas, where we will be exchanging 10 empties for 10 loads from the Francis Branch, which will go to Elkins for assembly into an eastbound train to Baltimore.
Continuing west, we’ll enter a tunnel that will carry us deep into West Virginia, as well as into a tight helix, spiraling up to reach the upper level, leading us to the Elkins Yard. This is the busy terminal where coal from several branches gets classified and loaded coal trains get made up, ready to travel east. A small engine house stores the power needed to heft those black diamonds over the mountains and on to the sea.
Taking the Connellsville line west from MY Tower, the tracks leave Luke, and enter Big Savage Tunnel, which loops around under the mountain behind the paper mill. It emerges and crosses the Casselman River, which it follows for some distance, traversing a second bridge at Casselman Crossing. Entering another tunnel, the track passes under Thomas, then loops back around, again following the river and descending to a long passing siding that's located below decks under Cumberland. The siding ends as it emerges from under the Cumberland station tracks, then runs across the front of the room, before entering another helix, which drops down to the west end staging yard.

Downloadable Timetable for the WMRY Western Lines Layout
Note, the timetable was done for the original temporary track plan. A new timetable is being prepared for publication.
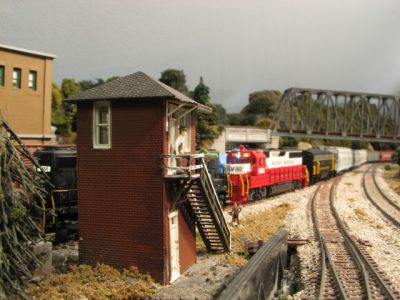
MY Tower (Maryland Junction) is the busiest part of the railroad. It's where the Thomas Sub splits from the Main Line. F-7 235 is leading an Alpha Jet eastbound on the main. The Thomas Sub is on the left side of the tower.
N&W power was frequently seen on Alpha Jets, running through from Connellsville to Hagerstown.
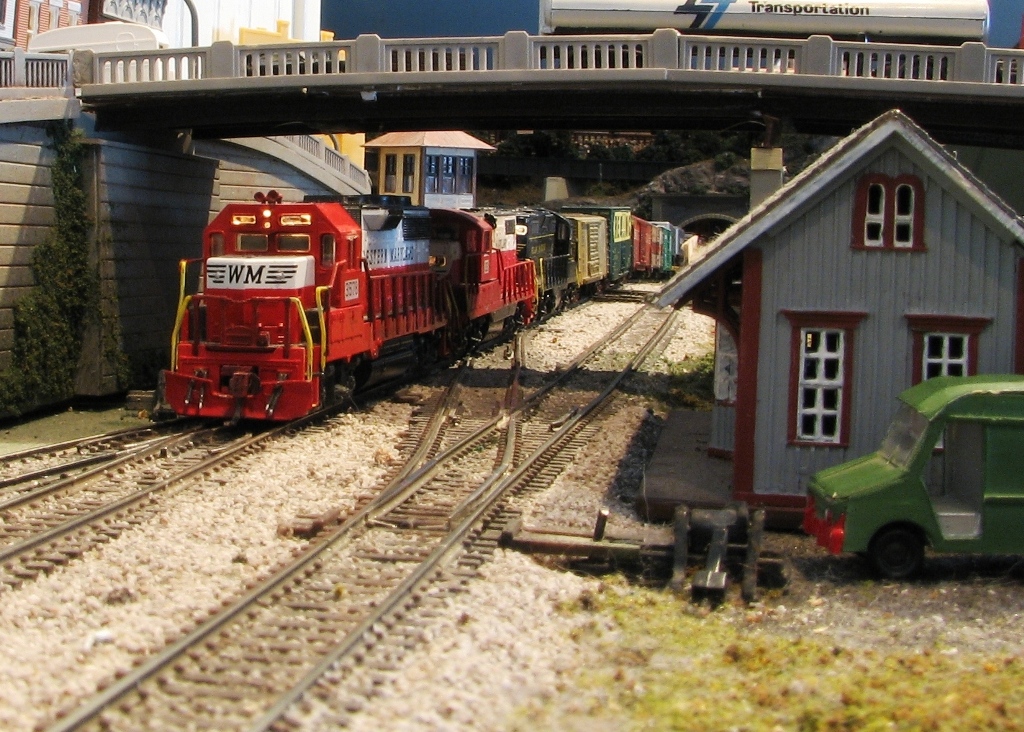
AJ-3 rolls through North Junction while the Penn Central transfer waits for clearance.

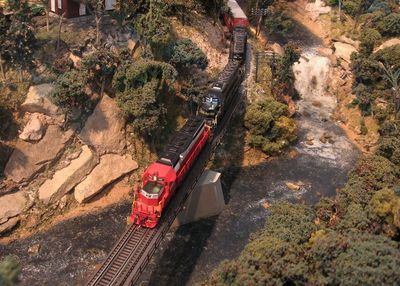
F-7 234 eases a coal train down grade from the Thomas Sub.

Laurel Valley 1804 on a run-through from Rockwood Jct.
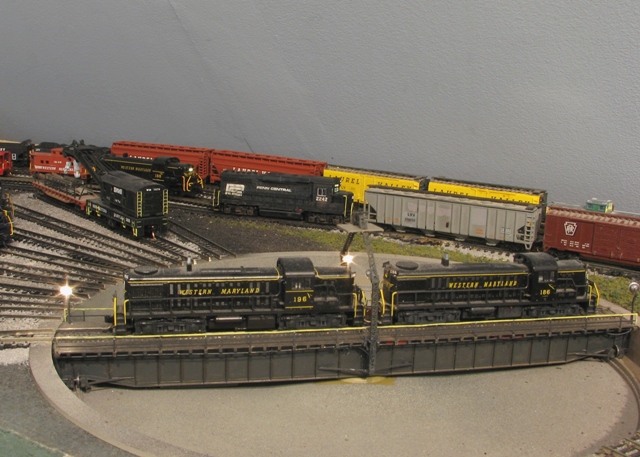
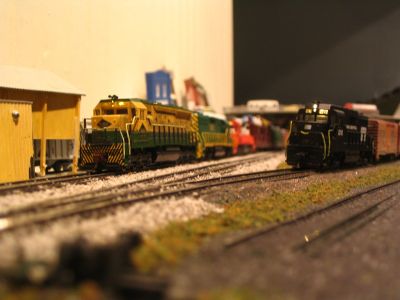
RS-3's take a spin on the turntable at Ridgely while a turn from the Penn Central arrives at the east end of the yard.
The crew of SD40 7445 pick up orders at Williamsport Jct.
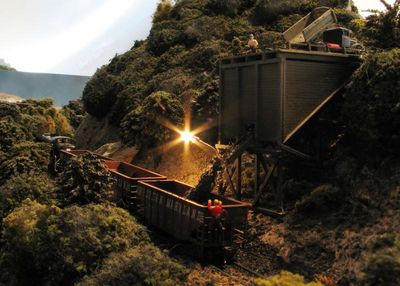
The morning silence in the mountains is broken as 55 tons of coal drops noisily into a hopper at Shaw

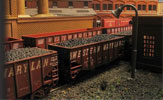
Switching at the Paper Mill

Night time in the pulpwood yard
BT-1 passes North Junction on the way to Hagerstown
A westbound Alpha Jet speeds toward Connellsville to hand off the train to the Norfolk and Western